
Be The Final Boss Castle Defense: Guia de Estratégia e Layout
Domine a arte do posicionamento em camadas de lacaios, combate ativo de chefe e diagnóstico de ondas para defender seu castelo no Be The Final Boss do…
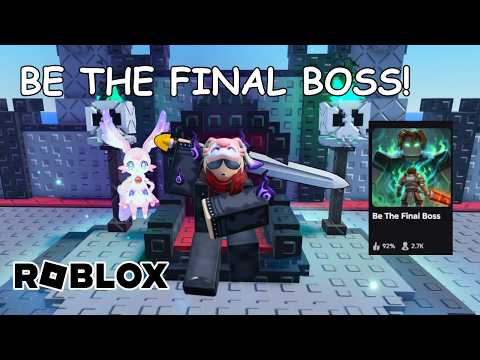 Mídia oficialDomine a arte do posicionamento em camadas de lacaios, combate ativo de chefe e diagnóstico de ondas para defender seu castelo no Be The Final Boss do…YouTube
 Na experiência Roblox Be The Final Boss, os jogadores assumem o papel do vilão supremo para defender seu castelo contra ondas infinitas de heróis invasores. Uma defesa bem-sucedida em be the final boss castle defense depende de uma formação de lacaios estruturada e em camadas. Para parar os heróis antes que eles alcancem seu trono, posicione unidades corpo a corpo altamente duráveis nos pontos de entrada iniciais para atrasar os atacantes que se aproximam, posicione causadores de dano à distância frágeis com segurança atrás delas e use ativamente os ataques de espada do chefe para limpar quaisquer vazamentos. Ajustar sua configuração com base em qual camada de defesa entra em colapso primeiro garante uma progressão constante pelas ondas desafiadoras do jogo.
Projetando uma Formação de Lacaios em Camadas
O layout do mapa nesta experiência permite o posicionamento deliberado de unidades. Os jogadores devem usar essa liberdade para projetar uma formação funcional, em vez de uma linha puramente decorativa. Uma defesa estruturada foca em encurtar o acesso do inimigo às suas unidades frágeis, maximizando o tempo que cada atacante pode contribuir para a luta.
A primeira linha de defesa deve consistir em suas unidades corpo a corpo mais resistentes disponíveis. Essas unidades devem ser colocadas diretamente no ponto de entrada dos heróis onde ocorre o primeiro contato. O papel principal delas é absorver dano e atrasar os heróis invasores, criando um gargalo que mantém o grupo inimigo no lugar.
Atrás dessa linha de frente durável, você deve posicionar seus atacantes à distância, como Skeleton Archers e outras unidades com pouca vida. Mantê-los protegidos garante que eles possam causar dano continuamente sem serem alvos diretos. Se os heróis alcançarem suas unidades à distância antes que a linha de frente seja esgotada, isso indica uma falha no posicionamento ou falta de durabilidade na linha de frente.
Evite espalhar demais suas unidades causadoras de dano. Quando as unidades ficam dispersas pelo mapa, elas acabam travando batalhas isoladas, permitindo que os heróis as derrotem uma a uma. Agrupar unidades garante fogo concentrado, o que é muito mais eficaz para limpar as ondas. Além disso, evite deixar espaços vazios na capacidade enquanto economiza para uma invocação perfeita não verificada; uma formação completa de unidades básicas organizadas nas camadas corretas superará uma linha esparsa de unidades raras colocadas nas posições erradas.
| Camada de Defesa | Tipos de Unidades Recomendados | Objetivo Principal | Estratégia de Posicionamento |
|---|---|---|---|
| Linha de Frente | Corpos Corpo a Corpo Mais Resistentes | Absorver dano e atrasar heróis | Colocar diretamente nos pontos de primeiro contato |
| Linha Média | Skeleton Archers / Atacantes Frágeis | Causar dano à distância sustentado | Posicionar com segurança atrás dos bloqueios corpo a corpo |
| Linha de Trás / Área do Chefe | Final Boss (Jogador) | Interceptar vazamentos e finalizar sobreviventes | Ficar ao alcance da rota principal perto do trono |
Engajamento Ativo do Chefe e Posicionamento de Rota
Embora invocar lacaios seja crítico, o chefe final não deve ficar ocioso. Ataques ativos de espada são um componente essencial do seu plano de defesa geral. Ficar passivo no trono durante ondas intensas é um erro comum que frequentemente leva a uma derrota precoce.
Seu movimento como chefe deve ser deliberado. Posicione-se em um local onde possa alcançar facilmente quaisquer heróis que passem pelas suas defesas, sem abandonar completamente a rota principal. Isso permite que você apoie seus lacaios durante ondas intensas, enquanto permanece posicionado para proteger o castelo. Mantenha seus golpes de espada focados nos alvos de maior prioridade, especialmente aqueles que conseguiram romper os bloqueios corpo a corpo da sua linha de frente.
Equilibre seus investimentos defensivos. Se seus lacaios à distância estão morrendo logo no início da onda devido a uma proteção ruim na linha de frente, investir recursos no aumento do dano do jogador não resolverá o problema central. Mantenha o foco em manter uma linha de lacaios estável antes de confiar apenas no combate do chefe.
| Cenário | Posição do Chefe | Prioridade de Ação | Objetivo |
|---|---|---|---|
| Fase Inicial da Onda | Transição da rota média | Observar o desempenho dos lacaios | Apoiar unidades corpo a corpo com ataques de espada |
| Onda Pesada / Vazamentos | Perto do trono / junção de rotas | Focar nos heróis que vazaram | Evitar que os heróis alcancem o trono |
| Colapso da Linha | Recuando para segurança | Focar fogo em alvos com pouca vida | Limpar ameaças restantes antes do fim da partida |
Diagnosticando Falhas nas Ondas e Ajustando Melhorias
Quando uma partida falha, a reação imediata pode ser melhorar tudo aleatoriamente. No entanto, uma abordagem estruturada para as melhorias é muito mais eficiente. O primeiro passo para melhorar a defesa do seu castelo é aprimorar a ordem da sua formação, em vez de depender da sorte. Uma unidade rara não pode compensar o fato de ser colocada na camada errada.
Use uma regra simples de avaliação para diagnosticar falhas. Observe o primeiro herói que consegue alcançar o chefe. Se esse herói chegar à sua posição com muita vida, seu exército está fraco demais. Neste caso, você precisa aumentar sua produção de dano ou reestruturar seu posicionamento. Se o herói chegar quase derrotado, melhorar a arma do seu chefe ou os atributos do jogador na árvore de habilidades é a solução mais limpa e eficiente.
Mova ou melhore apenas a camada específica que falhou primeiro. Se sua linha de frente colapsou instantaneamente, foque em melhorar a durabilidade corpo a corpo. Se sua linha de frente aguentou, mas o tempo da onda acabou ou os heróis passaram com vida cheia, foque em melhorar seu dano à distância. À medida que avança pelas ondas infinitas de heróis, você ganhará a habilidade de subir o nível da sua árvore de habilidades e desbloquear novas armas. Essa progressão deve correr em paralelo com as melhorias dos seus lacaios.
| Falha Observada | Causa Raiz | Solução Principal | Evite Esta Ação |
|---|---|---|---|
| Linha de frente morre instantaneamente | Durabilidade corpo a corpo insuficiente | Melhorar ou substituir unidades da linha de frente | Adicionar dano ao jogador |
| Heróis alcançam o chefe com muita vida | Baixo dano geral do exército | Melhorar unidades à distância ou reorganizar formação | Deixar capacidade aberta |
| Heróis alcançam o chefe quase mortos | Pequeno vazamento / limpeza fraca do chefe | Melhorar arma do chefe ou atributos do jogador | Realocar toda a linha de frente |
Integrando Recursos do Update 1 à sua Estratégia
A introdução do Update 1 traz vários elementos novos ao jogo que podem aprimorar suas estratégias de defesa. Os jogadores podem acessar três novas unidades, a mutação Demonic, Gold Rush, Shard Storm, Cursed Moon e um útil Unit Index. A experiência é totalmente otimizada e jogável em plataformas desktop, móvel e console.
Ao planejar seu layout, use the Unit Index para revisar as funções e atributos das unidades. Este índice é o melhor lugar para verificar estatísticas, custos e habilidades das unidades. Conforme você desbloqueia novas unidades ou aplica a mutação Demonic, avalie como elas se encaixam na sua formação existente. Uma nova unidade só deve substituir uma antiga se desempenhar melhor a função específica daquela camada.
Se você está começando agora ou procurando um reforço rápido, pode resgatar o código de lançamento oficial listado na descrição do Roblox: betheboss. Use esse código para iniciar suas invocações e construir um exército inicial sólido antes de enfrentar as ondas infinitas mais difíceis. Como números exatos em tempo real, taxas de mutação e escalonamento de ondas podem ser ajustados em patches, tratar a interface do usuário do jogo como a autoridade final para todos os custos e porcentagens é a maneira mais segura de planejar suas melhorias.
| Recurso do Update 1 | Utilidade Estratégica | Como Aplicar | Etapa de Verificação |
|---|---|---|---|
| Três Novas Unidades | Expandir opções de formação | Substituir unidades mais fracas em camadas específicas | Verificar estatísticas no Unit Index |
| Mutação Demonic | Melhorar capacidades das unidades | Aplicar a unidades que se encaixam no seu layout atual | Verificar taxas de mutação na interface do jogo |
| Gold Rush / Shard Storm / Cursed Moon | Recursos oficiais do Update 1 | Ler o painel em tempo real antes de alterar o posicionamento | Registrar apenas os efeitos mostrados no jogo |
Código de Lançamento betheboss | Recursos iniciais | Resgatar imediatamente ao começar | Verificar o status do código na descrição do jogo |
Perguntas Frequentes
Onde os lacaios à distância devem ficar?
Lacaios à distância, como Skeleton Archers, devem ser colocados diretamente atrás de seus corpos corpo a corpo duráveis. Esse posicionamento oferece a eles o máximo de tempo de ataque seguro possível. Se você notar que os heróis invasores estão alcançando e derrotando suas unidades à distância antes que as unidades corpo a corpo da linha de frente se esgotem, você deve reposicioná-las mais para trás ou melhorar a durabilidade da sua linha de frente.
Por que os heróis ainda alcançam o chefe?
Se os heróis estão alcançando o chefe constantemente, é um sinal de que sua formação está morrendo cedo demais, sua produção de dano geral está muito baixa ou o posicionamento das suas unidades deixa os atacantes expostos. Observe atentamente as ondas para identificar qual camada entra em colapso primeiro. Ajuste e melhore apenas essa camada específica, em vez de alterar toda a sua configuração.
O chefe pode defender o castelo sozinho?
Não, o chefe não pode defender o castelo sozinho. Embora seus ataques ativos de espada sejam altamente eficazes para limpar vazamentos, o ciclo principal do jogo é projetado para lutar ao lado de lacaios invocados. Um exército forte e bem posicionado é essencial para reduzir o número de combates diretos e perigosos que você deve enfrentar.
Guias relacionados
Be The Final Boss Best Upgrades: Guia de Prioridades Estratégicas
Saiba como escolher os be the final boss best upgrades diagnosticando gargalos em dano, sobrevivência e economia para avançar em ondas infinitas.
Guia de Loadout de Be The Final Boss: Exército, Habilidades e Armas
Monte um loadout equilibrado em Be The Final Boss usando defesa em camadas, lacaios de linha de frente, dano à distância e melhorias estratégicas de…
Guia de Progressão de Be The Final Boss: Construa Poder Repetível
Domine o ciclo de progressão em Be The Final Boss. Aprenda a gerenciar Souls, Coins e Fusion Shards para construir um exército poderoso e defender seu…
Guia para Iniciantes de Be The Final Boss: Construa Sua Primeira Defesa de Castelo Estável
Domine o ciclo de defesa principal em Be The Final Boss. Aprenda a posicionar minions, gastar Coins e Souls, e aprimorar sua arma de boss de forma eficaz.