
Be The Final Boss Beste Upgrades: Ein strategischer Leitfaden für Prioritäten
Erfahre, wie du die besten Upgrades für Be The Final Boss auswählst, indem du Engpässe bei Schaden, Überleben und Wirtschaft analysierst, um in den…
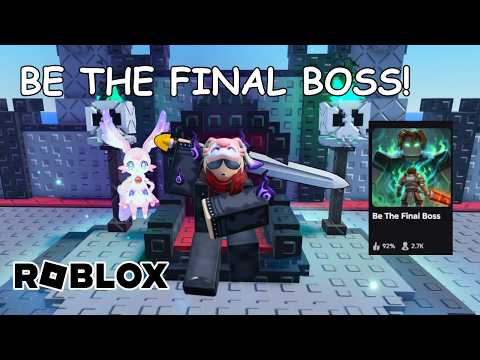 Offizielle MedienErfahre, wie du die besten Upgrades für Be The Final Boss auswählst, indem du Engpässe bei Schaden, Überleben und Wirtschaft analysierst, um in den…YouTube
 Die Auswahl der be the final boss best upgrades erfordert ein Umdenken: Weg vom Kauf des teuersten Knotens hin zur Diagnose, warum deine aktuelle Verteidigung versagt. Der Erfolg in diesem Roblox-Erlebnis hängt davon ab, die Stärke deiner Dienerschar, deine persönlichen Boss-Werte und deine Ressourcenwirtschaft im Gleichgewicht zu halten. Im Allgemeinen solltest du Unit Damage priorisieren, wenn Gegner deine Frontlinie überleben, und Boss Health oder Attack, wenn das Aufräumen zu einem ständigen Problem wird.
Die effektivste Strategie besteht darin, den spezifischen Engpass zu identifizieren – sei es das Überleben der Einheiten, das Aufräumen durch den Spieler oder die Beschwörungskapazität – und in die günstigste dauerhafte Verbesserung zu investieren, die diesen behebt. Indem du einer strukturierten Bewertungsmethode folgst, kannst du sicherstellen, dass jede ausgegebene Coin oder jeder Shard dazu beiträgt, höhere Wellen zu erreichen, anstatt nur irrelevante Zahlen aufzublähen.
Defensive Schwachstellen diagnostizieren
Bevor du deine Ressourcen investierst, musst du einen kompletten Durchlauf beobachten, um genau festzustellen, wo deine Verteidigung zusammenbricht. Be The Final Boss stellt mit zunehmenden Wellen unterschiedliche Herausforderungen dar, und ein Upgrade, das im frühen Spiel geholfen hat, ist im Mid-Game vielleicht nicht mehr die Lösung. Anstatt einer starren Baureihenfolge zu folgen, solltest du die aktuelle Benutzeroberfläche (UI) im Spiel nutzen, um zu überwachen, wie Helden mit deiner Burg interagieren.
Wenn du bemerkst, dass deine Diener sofort ausgelöscht werden, hilft es nicht, ihren Schaden zu erhöhen, da sie nicht lange genug leben, um ihn auszuteilen. Wenn deine Diener hingegen gesund sind, aber eine riesige Menge an Helden langsam an ihnen vorbeigeht, ist dein Schadensausstoß der Hauptengpass. Nutze die folgende Diagnosetabelle, um deine Beobachtung mit dem richtigen Upgrade-Pfad abzugleichen.
| Beobachtung während des Gameplays | Primärer Engpass | Empfohlener Upgrade-Fokus |
|---|---|---|
| Diener sterben innerhalb von Sekunden nach Heldenkontakt | Überleben der Einheiten | Unit Health oder Summon Capacity |
| Diener bleiben am Leben, aber Helden erreichen den Boss | Einheitenschaden | Unit Attack oder Skill Tree Damage |
| Boss stirbt durch wenige Helden mit wenig Leben | Überleben des Spielers | Boss Health oder Weapon Upgrade |
| Boss kann Helden beim Aufräumen nicht schnell genug töten | Spielerschaden | Boss Attack oder New Weapon |
| Starke Einheiten sind im Besitz, können aber nicht platziert werden | Kapazität | Altar Slots oder Summon Upgrades |
Um diesen Prozess zu verfeinern, lasse deine aktuelle Aufstellung laufen, ohne Änderungen vorzunehmen. Notiere dir die genaue Welle, bei der du scheiterst, und den spezifischen Grund für dieses Scheitern. Kaufe ein Upgrade, das direkt auf diesen Grund abzielt, und wiederhole dann den Durchlauf. Wenn du eine deutlich höhere Welle erreichst, setze diesen Weg fort. Wenn der Fehlerpunkt derselbe bleibt, musst du dir möglicherweise ein sekundäres System wie den Altar oder die Wirtschaft ansehen.
Armeestärke und das Aufräumen durch den Spieler ausbalancieren
Die Kraft in Be The Final Boss on Roblox ist aufgeteilt zwischen den Dienern, die du beschwörst, und dem Boss-Charakter, den du steuerst. Eine häufige Falle besteht darin, den persönlichen Attack-Wert des Bosses als Ersatz für eine schwache Armee zu behandeln. Obwohl der Boss für das Aufräumen unerlässlich ist, kann er die schiere Menge einer endlosen Heldenwelle nicht alleine bewältigen.
Investitionen in Waffen sind am effektivsten, wenn nur wenige geschwächte Helden durch deine Frontlinie schlüpfen. Wenn Dutzende gesunder Helden deine Burg erreichen, ist ein Waffen-Upgrade wahrscheinlich eine Verschwendung von Coins. In diesem Szenario hat die Armee Priorität. Du solltest deine bewährten Einheiten mit Shards verbessern, anstatt Ressourcen auf jede Einheit in deinem Inventar zu verteilen. Konzentriere dich auf die Einheiten, die den Kern deiner Aufstellung bilden.
| Upgrade-Typ | Am besten verwendet, wenn... | Ressourcen-Priorität |
|---|---|---|
| Unit Damage | Helden deine Frontlinie „tanken“, ohne zu sterben. | Hoch (Armee) |
| Boss Attack | Geschwächte Helden treffen kontinuierlich die Burg. | Mittel (Aufräumen) |
| Weapon Unlock | Du überschüssige Coins hast und ein neues Skill-Set benötigst. | Niedrig (Aufräumen) |
| Unit Health | Deine Frontlinie zusammenbricht, bevor die erste Heldenwelle stirbt. | Hoch (Überleben) |
Wenn du den offiziellen Release-Code betheboss verwendest, erhältst du möglicherweise einen anfänglichen Boost, der frühe Experimente ermöglicht. Nutze diesen, um eine Ausgangsbasis für die Leistung deiner Armee zu schaffen. Überprüfe im Laufe deines Fortschritts regelmäßig den Unit Index, um zu sehen, wie sich dein aktueller Kader im Vergleich zu neu freigeschalteten Einheiten oder Mutationen wie der Demonic-Mutation schlägt, die in Update 1 eingeführt wurde.
Wirtschaft und Effizienz des Summon Altar
Wirtschafts-Upgrades sind eine langfristige Investition. Sie bieten keine sofortige Verteidigungskraft und können tatsächlich zu einer Niederlage führen, wenn sie direkt vor einer schwierigen Welle gekauft werden. Die beste Zeit für den Kauf von Wirtschafts-Upgrades ist, wenn dein aktueller Durchlauf stabil und wiederholbar ist. Wenn du die aktuelle Welle problemlos bewältigen kannst, kannst du durch Investitionen in das Einkommen in zukünftigen Runden teurere Upgrades schneller bezahlen.
Der Summon Altar ist eine weitere kritische Komponente deines Fortschritts. Selbst die stärksten Einheiten sind nutzlos, wenn dir die Altar Slots fehlen, um sie zu platzieren. Wenn du feststellst, dass High-Tier-Einheiten in deinem Inventar liegen, während Low-Tier-Einheiten das Feld besetzen, ist dein Engpass die Beschwörungskapazität. Das Upgrade des Altars stellt sicher, dass deine wertvollsten Assets tatsächlich an der Verteidigung teilnehmen.
- Wirtschafts-Priorität: Führe Upgrades nur durch, wenn ein Durchlauf stabil genug ist, damit sich die Investition über mehrere Wellen hinweg auszahlt.
- Altar Slots: Priorisiere diese, wenn du stärkere Einheiten in deinem Inventar hast, die nicht in die aktuelle Aufstellung passen.
- Platzierungsstrategie: Stelle sicher, dass deine Upgrades mit der Anzahl der Einheiten übereinstimmen, die du tatsächlich auf dem Feld halten kannst.
Vermeide den Fehler, Altar-Upgrades zugunsten reiner Werte zu ignorieren. Eine größere Anzahl durchschnittlicher Einheiten schneidet oft besser ab als eine einzelne verbesserte Einheit, da die Heldenwellen ihren Schaden so verteilen. Überprüfe deine aktuelle Einheitenanzahl im Vergleich zu deiner maximalen Kapazität in der UI, bevor du dich für deinen nächsten Kauf entscheidest.
Die Features von Update 1 maximieren
Update 1 hat mehrere neue Systeme eingeführt, die den „besten“ Upgrade-Pfad verändern. Features wie die Demonic-Mutation, Shard Storm und Cursed Moon bieten neue Möglichkeiten, deine Macht zu steigern. Die Hinzufügung von drei neuen Einheiten und einem Unit Index bedeutet, dass Spieler eine größere Auswahl haben, aber die Kernlogik der Behebung von Engpässen bleibt dieselbe.
Wenn du diese neuen Features erkundest, verwende Shards, um Einheiten zu verbessern, die sich in deiner Aufstellung bereits als effektiv erwiesen haben. Die offizielle Beschreibung bestätigt die Demonic-Mutation, Gold Rush und Shard Storm, definiert jedoch nicht deren numerische Effekte. Lies jedes Live-Panel, zeichne auf, was sich während eines Durchlaufs ändert, und passe deine Ausgaben erst an, wenn das Spiel einen relevanten Nutzen zeigt.
| Feature | Strategischer Wert | Verifizierungsschritt |
|---|---|---|
| Unit Index | Verfolgung von Einheitenwerten und Potenzial. | UI überprüfen, um Basiswerte neuer Einheiten zu vergleichen. |
| Demonic Mutation | Skalierung von High-Tier-Einheiten. | Leistung mutierter Einheiten mit Standardeinheiten vergleichen. |
| Shard Storm | Effekt in der offiziellen Beschreibung nicht detailliert beschrieben. | Live-Panel lesen und die relevanten Stände vor und nach dem Durchlauf vergleichen. |
| Gold Rush | Effekt in der offiziellen Beschreibung nicht detailliert beschrieben. | Verwende es nur dann für ein Wirtschaftsziel, wenn das Live-Panel diesen Vorteil bestätigt. |
Beurteile den Erfolg eines Upgrades immer anhand der Ergebnisse im nächsten Durchlauf. Ein Upgrade erhöht vielleicht eine Zahl auf deinem Bildschirm, aber wenn es nicht zu schnellerem Abschließen oder einer späteren Welle des Scheiterns führt, war es nicht das „beste“ Upgrade für deine aktuelle Situation. Konzentriere dich auf die Leistung im Live-Spiel und nicht nur auf die Größe der Tooltips.
Frequently Asked Questions
Ist Unit Damage immer das beste Upgrade?
Nein. Während Unit Damage lebenswichtig ist, bietet es nur dann einen Mehrwert, wenn deine Einheiten lange genug am Leben bleiben, um anzugreifen. Wenn deine Aufstellung sofort von Heldenwellen ausgelöscht wird, solltest du Unit Health oder Summon Capacity priorisieren, um sicherzustellen, dass deine Frontlinie dem Kampf standhalten kann.
Wann sollte ich eine neue Waffe kaufen?
Du solltest eine neue Waffe kaufen, wenn eine kleine Anzahl geschwächte Helden beständig den Boss erreicht. Wenn die Helden, die dich erreichen, die volle Gesundheit haben oder in großen Gruppen auftreten, versagt deine Armee, und du solltest stattdessen in deine Diener oder Altar-Slots investieren, anstatt in persönliche Waffen.
Lohnen sich Wirtschafts-Upgrades?
Wirtschafts-Upgrades sind die Investition nur dann wert, wenn dein aktuelles Verteidigungs-Setup stabil und wiederholbar ist. Für eine Notfalllösung während eines verlorenen Durchlaufs sind sie eine schlechte Wahl, da es Zeit braucht, bis sich die Anschaffungskosten amortisieren. Nutze sie während der Farming-Sessions, um deinen langfristigen Fortschritt zu beschleunigen.
Verwandte Guides
Be The Final Boss Castle Defense: Strategie- und Layout-Leitfaden
Meistere die Kunst der geschichteten Schergen-Platzierung, des aktiven Boss-Kampfes und der Wellen-Diagnose, um deine Burg in Roblox' Be The Final Boss…
Be The Final Boss Early Game Route: Vom ersten Roll bis zu stabilen Wellen
Ein umfassender Leitfaden für die Be The Final Boss Early Game Route, mit Fokus auf Platzierung von Einheiten, Ressourcenmanagement und permanenten…
Be The Final Boss Einsteiger-Guide: Baue deine erste stabile Burgverteidigung
Meistere den Kern-Verteidigungszyklus in Be The Final Boss. Lerne, wie du Minions platzierst, Coins und Souls ausgibst und deine Boss-Waffe effektiv…
Be The Final Boss Loadout-Guide: Armee, Skills und Waffen
Erstelle ein ausgewogenes Be The Final Boss Loadout mit einer gestaffelten Verteidigung, Frontline-Minions, Fernkampfschaden und strategischen Upgrades…