
Be The Final Boss Wave-Guide: Analysiere jeden gescheiterten Run
Steckst du in einer schwierigen Welle fest? Nutze diesen Be The Final Boss Wave-Guide, um Engpässe zu diagnostizieren, die Platzierung der Einheiten…
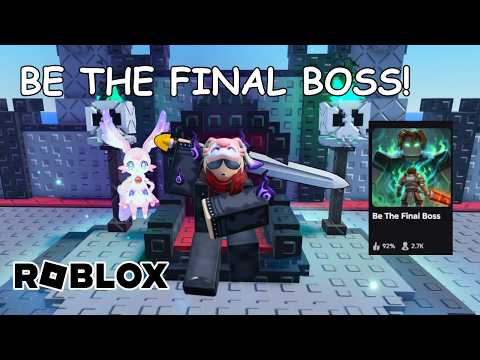 Offizielle MedienSteckst du in einer schwierigen Welle fest? Nutze diesen Be The Final Boss Wave-Guide, um Engpässe zu diagnostizieren, die Platzierung der Einheiten…YouTube
 Um in den herausfordernden Phasen von Be The Final Boss on Roblox voranzukommen, müssen Spieler ihre Burg als der finale Boss verteidigen, während Wellen von Helden angreifen. Wenn deine Verteidigung scheitert, liegt der Schlüssel darin, zu identifizieren, ob deine Frontline zu früh gestorben ist, dein Schadensoutput zu niedrig war oder dein Boss-Cleanup fehlgeschlagen ist. Dieser Be The Final Boss Wave-Guide bietet eine systematische diagnostische Checkliste, um deine Runs zu bewerten. Indem du beobachtest, wo die Helden deine Verteidigung durchbrechen, kannst du genau das Upgrade bestimmen, das in deinem Skill-Tree oder bei deinen Minion-Beschwörungen benötigt wird, um beim nächsten Versuch erfolgreich zu sein.
Analyse der Verteidigungsebenen der Burg
In dem Spiel von Apparently Champions beschwören Spieler Minions, besiegen endlose Heldenwellen, leveln einen Skill-Tree und schalten Waffen frei. Wenn dich eine Welle besiegt, liegt es selten nur an mangelnder Gesamtkraft. Stattdessen liegt das Scheitern meist in einer der drei Kern-Verteidigungsebenen.
Um das Problem zu diagnostizieren, musst du diese Verteidigungsebenen während des Gameplays beobachten. Die Frontline besteht aus deinen langlebigen Minions, die direkt im Pfad der Helden platziert sind. Hinter ihnen befinden sich deine geschützten Schadensausteiler. Schließlich fungiert der Spieler-Boss als Cleanup-Ebene an der Burg.
| Verteidigungsebene | Hauptfunktion | Fehlerindikator |
|---|---|---|
| Frontline | Absorbiert erste Heldenangriffe, um Einheiten in der hinteren Reihe zu schützen | Einheiten sterben, bevor Schadensausteiler die angreifenden Helden besiegen können |
| Schadensoutput | Fügt den ankommenden Heldenwellen hohen Schaden zu | Einheiten überleben, aber Helden passieren mit hoher Gesundheit |
| Boss-Cleanup | Die letzte Verteidigungslinie, in der der Spieler-Boss Leaks besiegt | Der Boss verliert Gesundheit oder stirbt während der Cleanup-Phase |
Indem du deine Verteidigung in diese unterschiedlichen Ebenen kategorisierst, kannst du vermeiden, Ressourcen für Upgrades zu verschwenden, die den unmittelbaren Engpass nicht beheben. Achte immer auf die Live-Wellenanzeigen, um genau zu sehen, wo die Helden beginnen, dein Setup zu überwältigen.
Die Wave-Fehler-Checkliste
Wenn ein Run scheitert, gib deine Ressourcen nicht sofort für zufällige Upgrades aus. Halte stattdessen nach der Niederlage inne und evaluiere den Run mit dieser Wave-Fehler-Checkliste. Dieser systematische Ansatz stellt sicher, dass du genau den Engpass anvisierst.
| Schritt | Zu stellende Frage | Zielbereich für Upgrades |
|---|---|---|
| 1 | Starb die Frontline, bevor geschützte Einheiten genug Schaden anrichteten? | Frontline-Überleben, Minion-Haltbarkeit oder Tank-Kapazität |
| 2 | Überlebten die Einheiten, aber Helden passierten mit viel Gesundheit? | Schadens-Upgrades für die hintere Reihe, Skill-Tree-Schadensknoten oder Waffen |
| 3 | Sind nur ein oder zwei geschwächte Helden durchgekommen? | Boss-Cleanup-Fähigkeiten, Waffen-Upgrades oder kleinere Skill-Anpassungen |
| 4 | Hat der Boss verloren, obwohl er genug Cleanup-Schaden verursacht hat? | Boss-Gesundheit, aktive Skills oder defensive Waffen-Stats |
| 5 | Welches bezahlbare Upgrade ändert direkt diese erste wahre Antwort? | Konzentriere die Ausgaben auf die am frühesten gescheiterte Ebene |
Wenn die Antwort auf einen Schritt unklar ist, führe dieselbe Formation erneut aus, ohne Ressourcen auszugeben. Ein wiederholtes Muster ist ein stärkerer Beweis für einen spezifischen Engpass als ein einzelner chaotischer Versuch. Das zweimalige Beobachten des exakten Fehlerpunkts verhindert falsche Investitionen.
Anpassung von Minion-Formationen und Platzierungen
Die Platzierung der Minions ist entscheidend, um deine zerbrechlichen Schadensausteiler am Leben zu erhalten. Wenn deine Fernkampf- oder Hochschadenseinheiten direkten Heldenangriffen ausgesetzt sind, sterben sie, bevor sie zur Verteidigung beitragen können.
Halte deine Nahkampfeinheiten vorne, um eingehenden Schaden zu absorbieren, und platziere geschützte Angreifer dahinter. Nutze die Live-Wellenanzeigen, um das Timing der ankommenden Wellen zu verfolgen. Wenn du bemerkst, dass deine Schadensausteiler erst angreifen, nachdem die Frontline bereits zusammengebrochen ist, passe ihre Positionierung näher am Geschehen an.
| Beobachtetes Verhalten | Angezeigtes Problem | Empfohlene Platzierungsänderung |
|---|---|---|
| Zerbrechliche Einheiten sterben sofort | Exponierte Schadensausteiler | Bewege zerbrechliche Angreifer weiter nach hinten hinter langlebige Frontline-Minions |
| Schaden greift zu spät ein | Schlechte Positionierung | Bewege Fernkampf- oder Schadenseinheiten näher an den Helden-Spawn-Pfad, ohne sie zu exponieren |
| Helden umgehen die Frontline | Unzureichender Block oder Aggro | Positioniere Nahkampfeinheiten an Engpässen neu oder erhöhe die Frontline-Dichte |
Überprüfe das Verhalten der Einheiten und die Angriffsreichweiten immer in der Live-Game-UI. Da Updates die Eigenschaften der Einheiten ändern können, ist das Beobachten in Aktion der zuverlässigste Weg, um deine Formation zu optimieren.
Ökonomie und Farming-Checkpoints
Das Upgraden deines Skill-Trees und das Freischalten von Waffen erfordert Ressourcen. Du wirst jedoch irgendwann eine Welle erreichen, bei der das notwendige Upgrade zu teuer ist, um es sofort zu kaufen.
In diesen Situationen solltest du nicht weiter versuchen, die gescheiterte Welle zu meistern. Kehre stattdessen zu einem bekannten, stabilen Checkpoint zurück, den du konsistent abschließen kannst. Das Farmen einer zuverlässigen Welle ermöglicht es dir, die Ressourcen zu sammeln, die für dein nächstes gezieltes Upgrade benötigt werden.
| Szenario | Aktion | Ziel |
|---|---|---|
| Upgrade ist bezahlbar | Sofort für den Ziel-Engpass ausgeben | Behebung des spezifischen Ebenenfehlers |
| Upgrade ist unbezahlbar | Rückkehr zu einem zuvor abgeschlossenen, stabilen Wellen-Checkpoint | Sicher Ressourcen farmen, ohne wiederholt zu scheitern |
| Neuer Code verfügbar | Löse betheboss im Spiel ein | Bestätigte Starter-Vorteile erhalten, um bei frühen Upgrades zu helfen |
Zusätzlich können Spieler den Code betheboss einlösen, der durch die offizielle Roblox-Beschreibung bestätigt wurde, um ihren Fortschritt zu unterstützen. Nutze diesen Code, um dir frühzeitig Ressourcen zu sichern, und spare sie für die spezifischen Engpässe auf, die durch deine Checkliste identifiziert wurden.
Vermeidung gängiger Fehler beim Wellenfortschritt
Ein häufiger Fehler besteht darin, jede Niederlage als reines Schadensproblem zu betrachten. Spieler geben oft all ihre Ressourcen für das Upgrade von Schadensknoten aus, nur um festzustellen, dass ihre zerbrechlichen Einheiten immer noch sofort sterben.
Ein weiterer Fallstrick ist das Vertrauen auf unbestätigte Community-Theorien. Vermeide es, erfundene exponentielle Skalierungsprozentsätze zu verwenden oder die Existenz unbestätigter Einheitenklassen anzunehmen. Halte dich an die Minions und Skill-Tree-Knoten, die in deiner Live-Game-UI sichtbar sind.
| Falsche Annahme | Korrekter diagnostischer Ansatz |
|---|---|
| "Ich habe verloren, also brauche ich mehr Schaden." | Prüfe, ob deine Frontline zuerst gestorben ist oder ob der Boss in der Cleanup-Phase gescheitert ist. |
| "Diese Welle skaliert exponentiell um X%." | Verlasse dich auf Live-Wellenanzeigen und aktuelle In-Game-Stats statt auf unbestätigte Formeln. |
| "Ich muss unbestätigte Einheitentypen freischalten." | Arbeite mit den Minions und Skill-Tree-Knoten, die aktuell in der Live-UI sichtbar sind. |
Da Balance-Änderungen auftreten können, verwende immer die aktuelle In-Game-UI als endgültige Instanz für Kosten, Raten und Statistiken.
Häufig gestellte Fragen
Warum verliere ich immer bei derselben Welle?
Der erste Engpass wurde noch nicht behoben. Beobachte, ob das Überleben, der Schaden, das Cleanup oder die Kapazität fehlschlägt, und konzentriere dich dann nur auf diese Ebene.
Sollte ich die Platzierung der Einheiten ändern?
Ja, wenn zerbrechliche Einheiten exponiert sind oder der Schaden zu spät einsetzt. Halte Nahkämpfer vorne und geschützte Angreifer dahinter.
Wann sollte ich stattdessen farmen?
Farme den vorherigen stabilen Checkpoint, wenn das richtige Upgrade bekannt, aber noch nicht bezahlbar ist.
Verwandte Guides
Be The Final Boss Endless Waves: Stabile Push-Strategie
Pushe endlose Wellen in Be The Final Boss mit wiederholbaren Checkpoints, geschichteten Minions, gezielten Upgrades und Ressourcendisziplin.
Be The Final Boss Helden-Wellen: Kompletter Kampf- und Verteidigungs-Guide
Meistere die aktive Kampfschleife in Be The Final Boss. Lerne, wie du Helden-Wellen verwaltest, Minions positionierst und deine Boss-Waffe einsetzt, um…
Be The Final Boss Höchste Welle: Strategie- und Push-Guide
Erfahre, wie du deine höchste Welle in Be The Final Boss durch kontrollierte Checkpoints, gezielte Upgrades und Performance-Optimierung systematisch…
Be The Final Boss Wellen-Belohnungen: Währungs- und Fortschritts-Guide
Optimiere deine Be The Final Boss Wellen-Belohnungen. Erfahre, wie du Coins, Souls und Fusion Shards effizient mithilfe von Checkpoints und Events farmst.